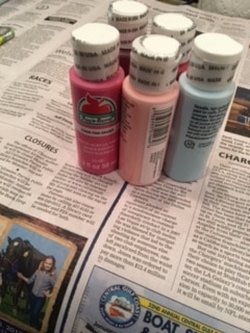
Stretched canvas. Any size will do, but you want it large enough to accommodate all your family members’ involvement. We chose a 10” x 10” stretched canvas.
One craft paint for background. We used blue.
One craft paint for each family member. No tow shades should be the same. We chose cherry red, brick, light pink, and hot pick for our colors because we wanted a Valentine look.
A large, simple shape cut out of construction paper, or a stencil. We opted for a heart, but a star, fleur-de-lis, sea shell, or family initial would work as well.
Sealer. We chose Modge Podge. (This is optional.)
Pencil
2 Paint sponges
Tape
Small Paper plates for each crafter, plus one for the background paint
Plastic wrap
Newspaper/drop cloth
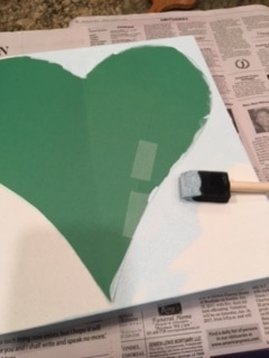
#1. Cover your work surface with newspaper and collect your supplies.
#2. Using double-sided tape or tape rolled on itself, affix your shape to the canvas.
#3. Trace the shape with a pencil.
#4. Squirting a small amount of background color onto a paper plate, paint the background. Begin with the edges of the canvas. Then move to the front of the canvas.
Tip: Cover any leftovers on the plate with plastic wrap. Wrap the used sponge as well. This will keep this shade of paint from drying out until you can use it for any needed touch-ups.
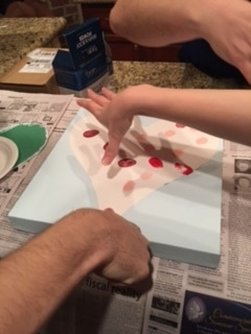
#5. Have everyone squirt a small amount of his or her shade of paint on a paper plate.
#6. Have each person press his or her thumb into the paint.
#7. Using thumbs like a brush, dab the paint all over the canvas.
Tip: MINOR overlapping of one another is fine as you want to fill in all the white space, but try to keep each thumbprint intact.
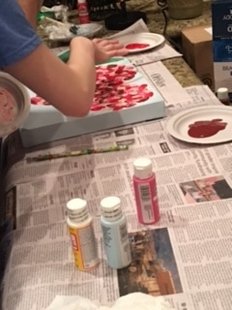
#8. Repeat the process of stamping with each person's thumb until the entire canvas is covered with thumbprints.
Tip: Placing thumb tips on the pencil line will ensure the edges of the shape are filled in.
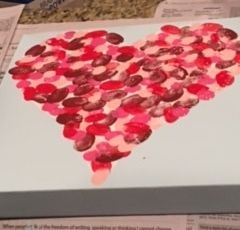
#9. Once the shape is filled with thumbprints, allow the paint to dry.
#10. Touch up any spatters, etc. on the background.
#11. When the canvass is completely dry, apply a thin layer of sealant with a paint sponge, if desired. This is optional.
Tip/Tidbit: Turn this into a meaningful activity by adding a Bible verse, snack, and discussion. Additional activities can be added to bring home the point.
Tip: Once touch-ups have been made, put away paint supplies. While the paint dries, make heart bags into which you will drop notes of encouragement, small gifts, or Bible verses to one another. The bags will be opened on Valentine's Day.
As the sealant dries, enjoy your snack and a discussion of the Bible verse.
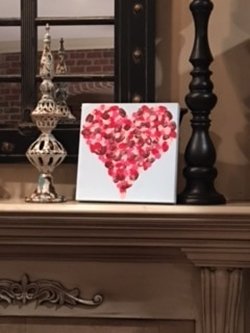
#12. Display your canvas in a prominent setting, and let it be a reminder of the fun you shared or of your lesson on love.
Tip: Now is the time to feel like an artist...
Tip: Take the love to the streets: pass out heart shaped candy to neighbors or to strangers--whomever is outside is a good candidate to shower with love.
Bible verse: John 15:12-"This is my commandment, That ye love one another, as I have loved you."
Points to make in the discussion: Love isn't an option; we are supposed to love. We CAN love. It is our choice. Love is a blessing. We feel happy when we love. Our family loves! We love one another, and we love others.
Snack ideas: grilled cheese cut into heart shapes, heart shaped pretzels, cheese or melon cut with heart shaped cookie cutters, heart shaped cookies, or cupcakes with heart sprinkles.
Supplies for note bags: Brown or white paper gift bags, glitter, doilies, construction paper, glue, and note cards. Decorate the bags, pass out the note cards, and secretly add your "sweet somethings" to each bag, filling the bag with goodies in the upcoming weeks.
Taking action: Grab a few bags of heart-shaped candy and head to the streets. Go for a walk in your neighborhood and pass out the candy to anyone you see, or take a drive to a community park and do the same. As you pass out the candy, tell folks that you want to let them know that they are loved.






 RSS Feed
